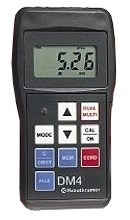
Ultrasonic wall thicknes measurement DM4
This unit is needed for determining the remaining wall thickness after corrosion and erosion damage. It is an intelligent, easy-to-use ultrasonic thickness gauge.
Measurements in pipes, pressure vessels, gas cylinders, storage tanks, tanks for chemical processes but also for bridges, ship hulls, cranes or general steel constructions.
This meter can also be equipped with a high temperature head (600 ° C).
- External probe for 1.5m distance
- Robust, impact-resistant housing with additional protective rubber cover
- Automatic zero calibration
- Calibration to known wall thickness is possible
- Calibration to known speed of sound is possible
- Impact and drop resistant
Technical data
- Measuring range – 1,2mm bis 200,0mm
- Operating frequency – 5 MHz
- Resolution display – bis 99,99mm 0,01mm otherwise 0,1mm
- Weight – 290g
- Dimensions without cover
Height – 150mm
Width – 70mm
Thickness – 33mm
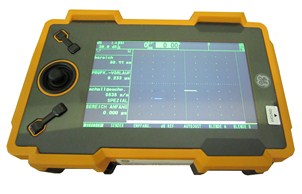
DMS Go Thickness Gauge
- High measurement stability and measurement reliability by using the zero-crossing measurement technique.
- Automatic gain control for excellent repeatability and corrosion monitoring.
- An integrated temperature compensation algorithm allows accurate measurement up to 540 C (1,000° F).
- Multiple calibration and zero-point calibration settings for repeatable accuracy, including:
- 2-point adjustment
- 1-point adjustment with automatic (on-block) zero-point calibration for each measurement (coupled)
- 1-point adjustment with user zero-point calibration in air (not coupled)
- Several types of measurement for any application including:
- A picture
- Wall thickness
- B-picture
- Min/Max
- Differential
- Support of multiple probes and functions for virtual support of each probe using the function for customized setting of the probe.
- Ability to operate in harsh environments with dust and moisture sealing according to IP67
Weld inspection
- Trigonometric Projections
- Calculation of surface distance, depth and sound distance to the reflector.
- Curvature correction (correction of the projected position in radial scanning).
- Color change (facilitating the positioning of the reflector, which indicates the different changes, with different colored backgrounds.
- AWS
- Automatic assessment in accordance with AWS D1.1 Code for welding in buildings
- DAC
- Allow for the assessment in accordance with EN ISO 17640, 11666 and 23279
- AVG
- Allow for the assessment in accordance with EN 1712
- trueDGS ®
- Significantly improved design options according to EN 583-2
Composites
- RF display
- 2 gates, where B-start is triggered with echo in Gate A
- Depth compensation (TCG) with high slope 120dB/µs for high damping materials
Eisenbahn
- High IFF (up to 2000 Hz)
- Lightweight (850 g/1.87 lbs.)
- Small size and ergonomic
- Accessories (Ergonomics Set: Hand strap, shoulder strap and belt attachment)


